Teams and People Management
This guide covers how to add, organize, and manage teams and individuals in ManagerDash.
Understanding Contributors
In ManagerDash, individuals are called "Contributors". Each contributor represents a person you manage or work with.
Contributor Properties
- Name: Full name of the person (required)
- GitHub Handle: GitHub username (required for PR integration)
- Initials: 2-3 letter abbreviation (optional, auto-generated if not provided)
- Color: Visual identifier used throughout the app
- Seniority Level: Optional classification (e.g., E1, E5, L6). This is customizable. See
Adding a Person
From the Sidebar
- Click the "+ Add Contributor" button in the sidebar
- Fill in the form:
- Name: Enter the person's full name
- Initials: (Optional) Enter 2-3 letters
- GitHub Handle: Enter their GitHub username (with or without @)
- Color: Click the color picker to choose a color
- Seniority Level: Select from dropdown (optional)
- Click Save
From the Home Dashboard
If no people exist yet:
- You'll see an empty state prompt
- Click "Add Your First Person"
- Fill in the inline form
- Click Save
Editing a Person
From the Sidebar
- Hover over the person's name in the sidebar
- Click the three-dot menu (⋮)
- Select Edit
- Update the fields in the inline form
- Click Save or Cancel
What You Can Edit
- Name
- GitHub handle
- Initials
- Color
- Seniority level
- Team assignment (via drag-and-drop)
Deleting a Person
⚠️ Warning: Deleting a person removes all associated data including goals, skills assessments, feedback, and PR evaluations. This action cannot be undone.
- Click the three-dot menu (⋮) next to their name
- Select Delete
- Confirm the deletion in the dialog
Teams
Teams help you organize people into logical groups.
Creating a Team
- Click "+ Add Team" in the sidebar
- Enter:
- Team Name: Required (must be unique)
- Description: Optional
- Click Save
Assigning People to Teams
Use drag-and-drop to assign people:
- Click and hold on a person's name
- Drag them to the desired team
- Release to assign
- The assignment is saved automatically
Unassigning from a Team
- Click and hold on the person's name
- Drag them to the "Unassigned" section
- Release to remove from team
Viewing Teams
Expanded Sidebar:
- Teams show as expandable cards
- Click team name to view team dashboard
- See all team members listed below
Collapsed Sidebar:
- Teams show as compact cards
- Team members appear as colored circles with initials
- Click to expand and see details
Sentiment Analysis
Starting in v1.7.0, ManagerDash includes sentiment tracking to help you monitor team member mood and satisfaction over time.
Understanding Sentiment
Sentiment tracking allows you to record quick check-ins on how team members are feeling. This helps you:
- Identify trends in team morale
- Spot potential issues early
- Track the impact of organizational changes
- Maintain regular emotional check-ins with your team
The 3-Point Scale:
- Sad (Red) - Team member is experiencing low mood or dissatisfaction
- Neutral (Blue) - Team member is in a middle-ground state
- Happy (Green) - Team member is feeling positive and satisfied
Recording Sentiment
Sentiment is recorded from the individual contributor dashboard.
How to Record:
- Select a team member from the sidebar
- On their dashboard, find the "Record Sentiment" form in the right sidebar
- Click one of the three sentiment buttons:
- Sad face icon (red)
- Neutral face icon (blue)
- Happy face icon (green)
- Optionally, add context in the text field: "what's driving this sentiment?"
- Click Save Sentiment
- The form clears and the sentiment is recorded
Context Field: The optional context field lets you add notes about what's affecting the person's mood:
- "Team morale is high after successful launch"
- "Dealing with burnout from long hours"
- "Excited about new project assignment"
- "Frustrated with technical blockers"
This context helps you remember what was happening during each check-in.
Team Sentiment Chart
The Team Sentiment Chart provides an aggregate view of your team's mood over time.
Location: Navigate to a team dashboard to see the Team Sentiment section.
Features:
-
Time Range Filter
- Last 14 days
- Last 30 days (default)
- Last 90 days
- Filters all sentiment data to the selected time window
-
Average Sentiment Display
- Large sentiment icon with color coding
- Numeric average (displayed to 2 decimal places)
- Interpretation label:
- Average ≥ 2.5: Happy (green)
- Average ≥ 1.5: Neutral (blue)
- Average < 1.5: Sad (red)
-
Sentiment Breakdown
- Three cards showing count and percentage for each sentiment level
- Visual distribution of team moods
- Helps identify if mood is consistent or varied
Empty State: When no sentiment data exists for the selected time range, you'll see a message encouraging you to start tracking team sentiment.
Sentiment Reminders
ManagerDash can remind you to check in on team member sentiment.
How Reminders Work:
- Default reminder window: 14 days (2 weeks)
- If you haven't recorded sentiment for a team member within the window, a reminder appears
- Reminder message: "Record sentiment for {name} because you haven't checked in on their mood in {window}"
- Reminders are configurable in the reminder rules settings
Managing Reminders:
- Reminders appear on dashboards and in the reminders section
- Recording sentiment for a person clears their reminder
- You can customize the reminder frequency in Settings
Best Practices for Sentiment Tracking
- Regular Cadence: Record sentiment weekly or bi-weekly during 1-on-1s
- Use Context: Always add a note about what's driving the sentiment
- Look for Trends: Use the team chart to identify patterns over time
- Act on Data: If sentiment drops, have a conversation to understand why
- Privacy: Sentiment data is stored locally and only visible to you
- Consistency: Track sentiment for all team members, not just those with issues
Sidebar Navigation
Collapsing/Expanding
- Click the arrow icon in the top-right of the sidebar
- Collapsed view shows icons and initials only
- Expanded view shows full names and details
Sidebar Sections
- Action Buttons: Add Team and Add Contributor
- Teams: All teams with their members
- Unassigned: People not on any team
- Settings: At the bottom (Preferences, Manage Teams, Export Data)
Notification Indicators
Starting in v1.6.0, the sidebar shows visual notifications to help you stay on top of important tasks:
Pending Feedback Indicator:
- A badge appears next to a person's name if they have pending feedback
- Helps you quickly identify who has feedback ready to deliver
- Click on the person to view and manage their pending feedback
- The indicator disappears once feedback is marked as delivered or converted to notes
This makes it easier to track which team members have feedback awaiting your attention during 1-on-1s.
Team Dashboard
When you select a team, you see:
Top Navigation
- Goals Tab: Team-wide goals
- Skills Tab: Aggregated team skills view
- Report Tab: Team performance report
Features
- Track team-level objectives
- Compare skills across team members
- Team Sentiment - View average team mood with time-based filtering (v1.7.0)
- Generate team reports
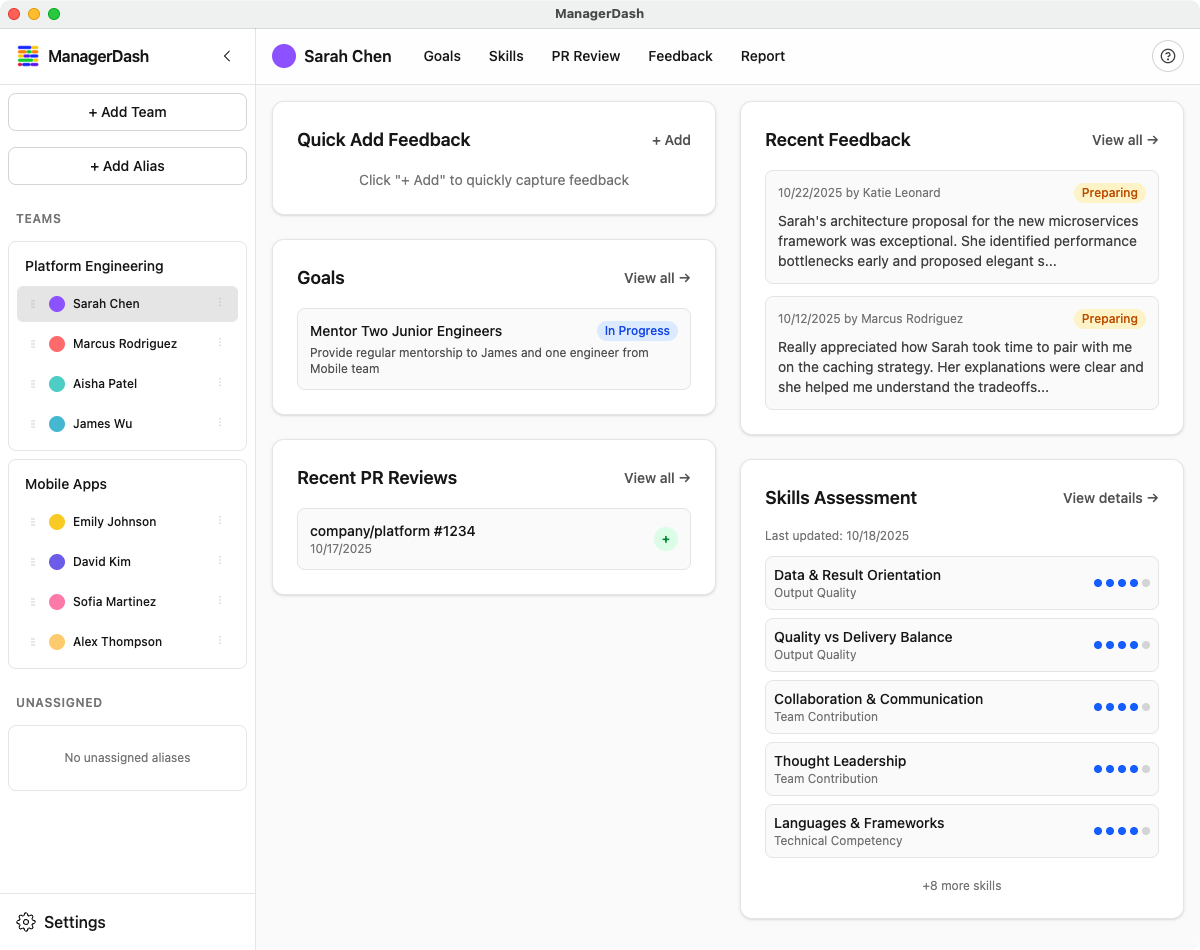
Individual Dashboard
When you select a person, you see:
Top Navigation
- Goals Tab: Individual goals
- Skills Tab: Skills assessment
- PR Review Tab: GitHub pull requests
- Feedback Tab: Feedback history
- Report Tab: Individual performance report
Features
- Complete personal development tracking
- PR quality evaluation
- 360° feedback collection
- Record sentiment check-ins with optional context notes (v1.7.0)
- Comprehensive reporting
Best Practices
Naming Conventions
- Use consistent naming (e.g., "First Last")
- Keep initials short and clear
- Choose distinct colors for easy identification
GitHub Integration
- Always add GitHub handles for developers
- Use the exact GitHub username (case doesn't matter)
- Test by fetching PRs after adding
Team Organization
- Create teams that match your org structure
- Keep team sizes manageable (5-10 people)
- Use descriptive team names
- Record sentiment regularly (weekly or bi-weekly) to track team morale trends and identify potential issues early
Regular Maintenance
- Update seniority levels as people grow
- Remove inactive team members
- Reorganize teams as your org changes
Seniority Levels
Seniority levels help categorize experience and expectations.
Setting Up Levels
Go to Settings → Manage Teams to configure:
- Code: Short identifier (e.g., "JR", "SR")
- Title: Full title (e.g., "Early Career Engineer")
- Description: Role expectations
Assigning Levels
- Assign when creating or editing a person
- Used in skills assessment for context
- Appears in reports
Common Issues
Duplicate GitHub Handle Error
Problem: "A contributor with this GitHub handle already exists" Solution: Each GitHub handle must be unique. Check existing people or use a different handle.
Team Name Conflict
Problem: "A team with this name already exists" Solution: Choose a different team name (case-insensitive check).
Can't See Person After Adding
Problem: New person doesn't appear Solution: Check the "Unassigned" section at the bottom of the sidebar.
Drag and Drop Not Working
Problem: Can't move person to team Solution:
- Make sure you're dragging from the drag handle icon
- Ensure sidebar is expanded
- Try refreshing the app
Tips
- Use Colors Strategically: Assign similar colors to team members for quick visual grouping
- Initials Display: In collapsed view, initials help identify people quickly
- Quick Access: Recently selected people/teams are easier to access
- Keyboard Navigation: Use Tab to navigate through forms quickly
- Bulk Setup: If adding many people, keep the form open and save repeatedly
- Sentiment Context: Use the sentiment context field to note what's driving mood - helps identify patterns over time